>> 목록보이기
#VirtualBox
#SliTaz Linux
#슬리타즈 리눅스
#weak-root-pw
#Live ISO
#웹해킹 훈련장
weak-root-pw 훈련장 만들기: SliTaz 리눅스 설치
웹해킹 훈련장은 주로 부팅이 가능한 ISO(Bootable ISO) 파일 형태로 배포하는 것이 일반적이다. ISO 파일에는 운영체제가 들어있어서 크기 클 수 밖에 없다. 때문에 훈련장의 기본이 되는 운영체제는 기본 크기가 작고 부팅ISO 파일을 만들기 쉬운 것으로 고르려고 하였다. 타이니 코어 리눅스(Tiny Core Linux, TCL)가 가장 작았으나 지속성(Persistence)을 유지하기가 까다로왔다. 그래서 크기가 비슷한 슬리타즈 리눅스(SliTaz Linux)를 훈련장의 기본 운영체제로 선택하였다. 슬리타즈 리눅스는 훈련장 코드를 구현한 후에 이를 포함하는 부팅ISO를 만들기도 용이하였다.
초소형 리눅스 관련 참고용 바깥고리
SliTaz Linux를 가상디스크에 설치하기
웹해킹훈련장은 그래픽 인터페이스(GUI)가 필요없으므로 가장 기본형 SliTaz ISO를 선택한다. 슬리타즈 리눅스에서 제공하는 배포판 ISO는 이외에도 여러가지가 구형 PC나 구형 노트북에서 사용해보고 싶은 때는 참조하기 바란다.
주인OS에서
슬리타즈 다운로드 페이지에
접속하여 slitaz-4.0-base.iso를 받거나 다음과 같이 wget을 이용하여
내려받는다. (현재 SliTaz 5.0이 개발되고 있으나 Base ISO는 제공되지 않아서 4.0으로 선택함)
wget http://mirror.slitaz.org/iso/4.0/flavors/slitaz-4.0-base.iso
슬리타즈 ISO를 받았으면 버추얼박스(VirtualBox)를 실행하고 새로 만들기(New) 메뉴를 클릭하여
손님OS를 만든다.
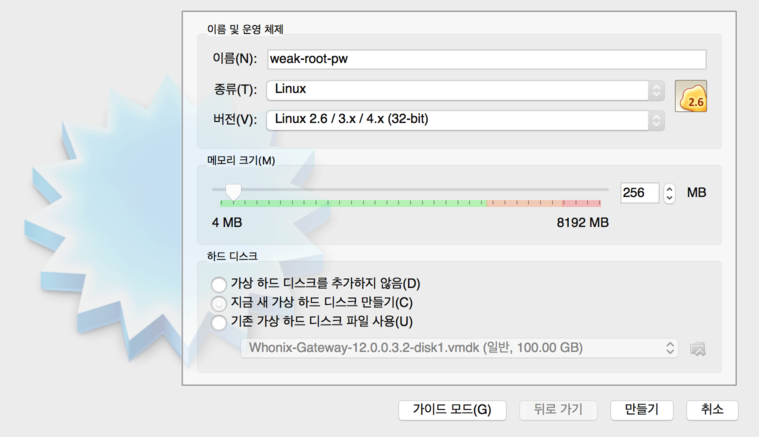
[ ↑ 메모리는 256MB로 설정 ]
메모리는 64MB 이상으로 설정한다. 32MB에서는 부팅이 되지 않았다. 굳이 256MB까지 필요하지는 않으나 향후의 다른 훈련장의 상황까지 고려하여 256MB로 계속 설정할 예정이다.
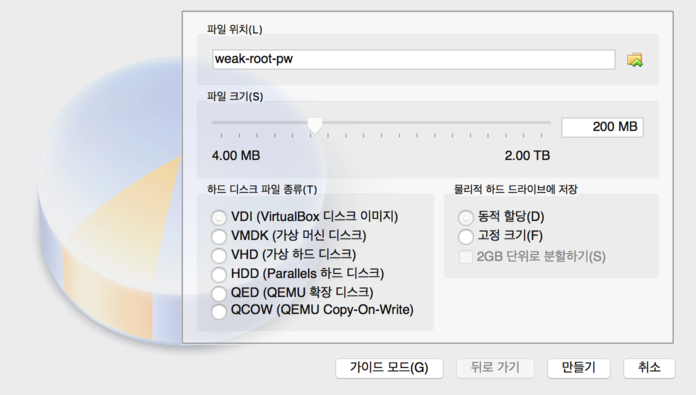
[ ↑ 하드디스크는 VDI로 설정하고 크기는 200MB로 설정 ]
가상 디스크는 200MB로 설정한다. 지금 구축할 weak-root-pw 훈련장에서는 추가 소프트웨어가 별로
없으므로 이 정도면 충분하다.

[ ↑ 설정(Setting)에서 CDROM에 슬리타즈 리눅스 ISO 파일 연결 ]
손님OS의 설정(Setting)을 클릭하여 저장소(Storage)를 선택한다. 광학 드라이브(Optical Drive)에
slitaz-4.0-base.iso를 연결한다. "IDE 세컨더리 마스터" 오른쪽의 CD 이미지를 클릭하여
선택할 수 있다.
이제 손님OS "weak-root-pw"를 시작(Start)한다.
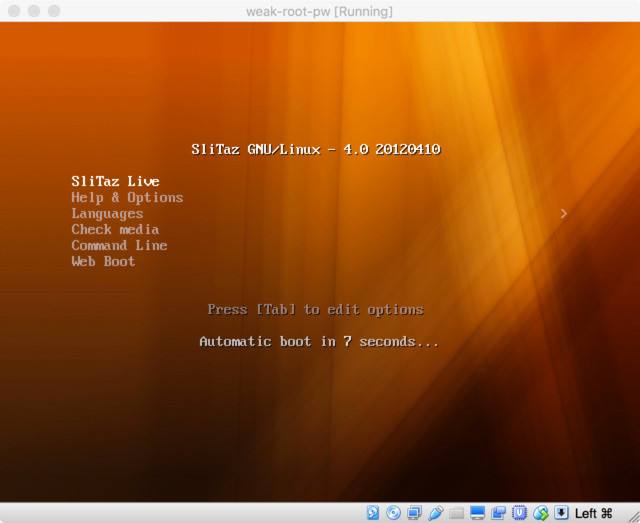
[ ↑ 슬리타즈 리눅스 부팅 첫 화면 ]
SliTaz Live를 선택하거나 8초를 기다리면 부팅이 계속된다.
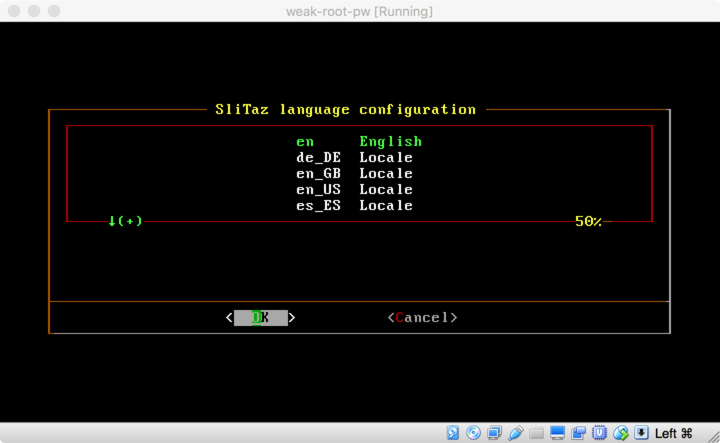
[ ↑ 슬리타즈 리눅스의 기본 언어 선택 ]
언어(language)는 기본인 en English를 선택한다.
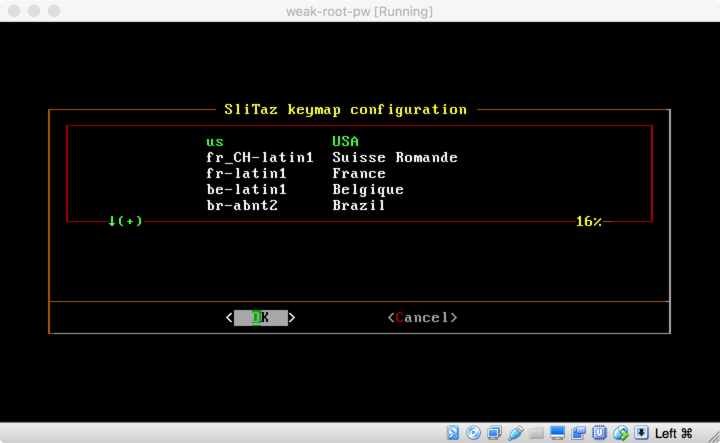
[ ↑ ]
키보드(keymap)은 기본인 us USA를 선택한다.
슬리타즈 서버에서 한글을 직접 입력할 필요가 없으므로 기본으로 설치한다.
향후 한글 입력이 필요할 경우에는 SSH로 접속하여 입력할 수 있다.
부팅이 완료되면 root 계정으로 로그인한다.
비밀번호는 계정과 동일한 "root"이다.
처음으로 해야 할 작업은 200MB로 설정한 가상디스크에 파티션을 만드는 일이다.
fdisk 명령어를 이용한다.
fdisk -l
fdisk /dev/hda
시스템에 따라서는 /dev/hda 대신 /dev/sda로 지정되기도 한다.
이 경우에 파티션을 만들면 /dev/sda1이 될 것이므로 유의하자.
다음은 fdisk를 이용하여 파티션을 할당한 실제 사례이다.
root@slitaz:~# fdisk -l

Disk /dev/hda: 209 MB, 209715200 bytes
16 heads, 63 sectors/track, 406 cylinders
Units = cylinders of 1008 * 512 = 516096 bytes

Disk /dev/hda doesn't contain a valid partition table
root@slitaz:~#
root@slitaz:~# fdisk /dev/hda
Device contains neither a valid DOS partition table, nor Sun, SGI, OSF or GPT disklabel
Building a new DOS disklabel. Changes will remain in memory only,
until you decide to write them. After that the previous content
won't be recoverable.


Command (m for help): p

Disk /dev/hda: 209 MB, 209715200 bytes
16 heads, 63 sectors/track, 406 cylinders
Units = cylinders of 1008 * 512 = 516096 bytes

   Device Boot      Start         End      Blocks  Id System

Command (m for help): n
Command action
   e   extended
   p   primary partition (1-4)
p
Partition number (1-4): 1
First cylinder (1-406, default 1): Using default value 1
Last cylinder or +size or +sizeM or +sizeK (1-406, default 406): Using default value 406

Command (m for help): w
The partition table has been altered!

Calling ioctl() to re-read partition table
root@slitaz:~#
이제 tazinst 명령어를 이용하여 라이브 ISO로부터 가상 디스크에 운영체제를 설치한다.
tazinst new 명령어는 설치할 슬리타즈 리눅스의 환경설정 파일의 초안을 생성한다.
root@slitaz:~# tazinst new /var/lib/tazinst.conf
/var/lib/tazinst.conf created
root@slitaz:~# vi /var/lib/tazinst.conf
vi 편집기를 이용하여 만들어진 설정 파일을 편집하여 다음과 같이 필요한 값들을 변경한다.
TGT_PARTITION="/dev/hda1"
TGT_HOSTNAME="weakpw"
TGT_ROOT_PWD="root"
TGT_USER="tux"
TGT_USER_PWD="tux"
TGT_GRUB="yes"
/dev/hda1는 환경에 따라서는 /dev/sda1가 될 수도 있다.
호스트명(TGT_HOSTNAME)은 향후 구축할 훈련장을 잞 표현할 수 있는 이름으로 만든다.
root와 tux 계정의 비밀번호는 일단 ID와 동일하게 설정하였다.
가상 디스크에서 부팅이 되어야 하므로 TGT_GRUB을 "yes"로 설정하여 GRUB을
설치하도록 하였다.
tazinst install 명령어로 설정한 운영체제를 가상디스크에 설치한다.
root@slitaz:~# tazinst install /var/lib/tazinst.conf
1. Formatting / partition: /dev/hda1 (ext3)
2. Installing SliTaz on: /dev/hda1
/usr/sbin/tazinst: line 54: /media/source/boot/grub/splash.xpm.gz: Permission denied
3. Configuring host name: weakpw
4. Configuring root and default user account: tux
Password for 'root' changed
Password for 'tux' changed
5. Running grub-install on: /dev/hda
Installation finished. No error reported.
This is the contents of the device map /mnt/target/boot/grub/device.map.
Check if this is correct or not. If any of the lines is incorrect,
fix it and re-run the script `grub-install'.

(hd0)	/dev/hda
6. Installation complete. You can now restart (reboot)
   from your SliTaz GNU/Linux system.
Copying log files (/var/log/tazinst.log)...
Unmounting target partition: /dev/hda1
Unmounting: /media/source
Ejecting cdrom...root@slitaz:~#
root@slitaz:~# reboot
하드디스크에 슬리타즈 설치가 끝나면 CDROM이 자동으로 제거된다(주황색 "Ejecting cdrom...").
이제 SliTaz Linux가 하드디스크에 저장되었으므로 다시 부팅(reboot)한다.
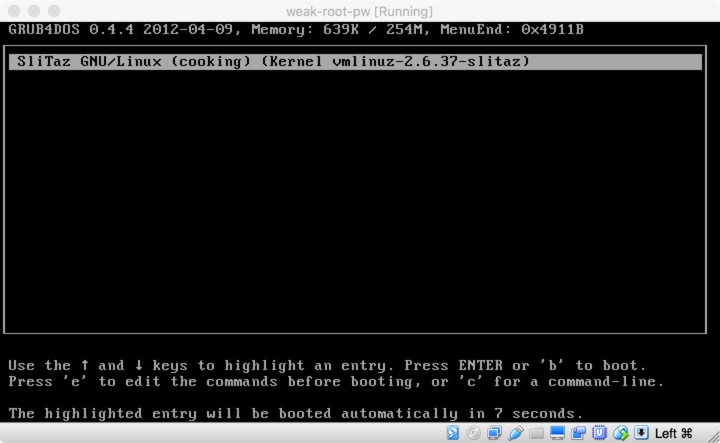
[ ↑ 하드디스크의 슬리타즈 리눅스가 부팅될 때의 첫 화면 ]
위와 같이 부팅이 끝나면 root/root로 로그인한다.
이제 tazpkg get-install 명령어를 이용하여 웹서비스에 기본적으로 필요한
apache, php, php-apache를 설치한다.
웹 서비스 확인에 도움이 될 수 있는 명령행 기반 웹 브라우저라고 할 수 있는
curl도 설치해 둔다.
tazpkg get-install apache
tazpkg get-install php
tazpkg get-install php-apache
tazpkg get-install curl
위 명령어들의 실행결과는 생략하였다. 추가 꾸러미 설치가 끝나면 다음과 같이
시작 서비스 설정파일(/etc/rcS.conf)을 수정한다.
root@weakpw:~# vi /etc/rcS.conf
vi 편집기로 /etc/rcS.conf 파일을 열어서 해당 줄을 다음과 같이 변경한다.
RUN_DAEMONS="dbus hald slim firewall apache dropbear"
MESSAGE="Welcome to weak-root-pw box."
SliTaz의 기본 웹서버인 lighttpd(httpd) 대신 apache로 대체한다.
dropbear는 SliTaz Linux가 기본으로 제공하는 SSH 데몬이다.
이 훈련장에서는 취약한 암호를 가지는 root 계정에 대한 실습을 할 예정이므로
dropbear를 활성화할 것이다.
이제 서비스 데몬 설정파일(/etc/daemons.conf)을 수정한다.
이 작업에서는 Dropbear sshd에서 기본으로 막고 있는 root 로그인 기능을 되살려서
서버를 취약하게 만든다.
root@weakpw:~# vi /etc/daemons.conf
vi 편집기로 /etc/daemons.conf 파일을 열어서 해당 줄을 다음과 같이 변경한다.
DROPBEAR_OPTIONS="-b /etc/dropbear/banner"
원본에는 DROPBEAR_OPTIONS="-w -g -b /etc/dropbear/banner"로
-w와 -g 옵션은 SSH를 통한 root 로그인을 차단한다.
이 훈련장에서는 원격으로 로그인할 수 있는 취약점을 만들 것이므로 두 옵션을 제거한다.
passwd 명령어를 이용하여 root 계정의 비밀번호는 취약하게 설정하고
일반 사용자인 tux 계정의 비밀번호는 추정하기 매우 어렵게 변경한다.
root@weakpw:~# passwd
Changing password for root
New password: s3cret
Retype password: s3cret
Password for root changed by root
root@weakpw:~#
root@weakpw:~# passwd tux
Changing password for tux
New password: w3bh4ck!23$
Retype password: w3bh4ck!23$
Password for tux changed by root
root@weakpw:~# reboot
두 계정의 비밀번호를 변경하고 나면 재부팅(reboot)한다.
부팅이 가능한 훈련장용 Live ISO 파일 만들기
부팅이 끝나면 다시 root 계정으로 로그인한다.
이번에는 위에서 변경한 root의 비밀번호("s3cret")를 입력해야 한다.
장치(Devices)의 광학 드라이브(Optical Drives)에 slitaz-4.0-base.iso 파일을 다시 연결한다.
mount 명령어를 이용하여 ISO 파일을 /media/cdrom에 마운트한다.
그리고 tazlito 명령어를 이용하여 현 상태의 운영체제 전체를 라이브 ISO로 만든다.
mount /dev/cdrom /media/cdrom
tazlito writeiso gzip weak-root-pw
다음은 mount, tazlito 명령어를 실제 실행한 결과이다.
root@weakpw:~# mount /dev/cdrom /media/cdrom
root@weakpw:~# tazlito writeiso gzip weak-root-pw

Write filesystem to ISO
===============================================================================
The command writeiso will write the current filesystem into a suitable cpio
archive (rootfs.gz) and generate a bootable ISO image (slitaz.iso).

Archive compression: gzip

Do you wish to remove the sound card and screen configs ?
Press ENTER to keep or answer (No|yes|exit): yes
Removing current sound card and screen configurations...  OK
Creating rootfs.gz with gzip compression...

Filesystem size: 10.5M

Generating ISO image...
Size of boot image is 4 sectors -> No emulation
 72.02% done, estimate finish Tue Nov 15 09:01:58 2016
Total translation table size: 2048
Total rockridge attributes bytes: 4648
Total directory bytes: 10592
Path table size(bytes): 38
Max brk space used 21000
6951 extents written (13 MB)
Creating hybrid ISO...  OK
Creating the ISO md5sum...  OK
===============================================================================
ISO image: 14.0M	/home/slitaz/distro/weak-root-pw.iso

Exit or burn ISO to cdrom (Exit|burn)? Exit
root@weakpw:~# ls -als /home/slitaz/distro/
total 14382
   1 drwxr-xr-x    3 root     root          1024 Nov 15 09:01 .
   1 drwxr-xr-x    3 root     root          1024 Nov 15 09:01 ..
   1 drwxr-xr-x    3 root     root          1024 Nov 15 09:01 rootcd
14378 -rw-r--r--    1 root     root      14680064 Nov 15 09:01 weak-root-pw.iso
   1 -rw-r--r--    1 root     root            51 Nov 15 09:01 weak-root-pw.md5
root@weakpw:~#
약 20MB 정도의 weak-root-pw.iso 파일과 이 파일의 MD5 해쉬값을 저장하는
weak-root-pw.md5 파일이 /home/slitaz/distro/ 디렉토리에 생성된 것을
볼 수 있다.
scp 명령어를 이용하여 주인OS나 다른 시스템으로 전송하여 배포하면 된다.
이 누리집에서는 여기에서 내려받을 수 있다.
취약한 계정에 대한 공격 방법은
여기에서 열람할 수 있다.
[처음 작성한 날: 2016.11.15] [마지막으로 고친 날: 2016.11.16]
< 이전 글 : weak-root-pw 훈련장 웹취약점 분석 보고서 (2016.11.17)
> 다음 글 : 버추얼박스 가상머신에서 Tails OS 설치 (2016.11.14)
 이 저작물은 크리에이티브
커먼즈 저작자표시 4.0 국제 라이선스에 따라 이용할 수 있습니다.
이 저작물은 크리에이티브
커먼즈 저작자표시 4.0 국제 라이선스에 따라 이용할 수 있습니다.
잘못된 내용, 오탈자 및 기타 문의사항은 j1n5uk{at}daum.net으로 연락주시기 바랍니다.
문서의 시작으로 컴퓨터 깨알지식 웹핵 누리집 대문